This post is all about how to install VMware PowerCLI and getting connected to vCenter using PowerShell 7. I am using PowerShell 7 for this walkthrough on a windows 10 box. By the end of this guild, you will be able to connect to your vCenter server and run PowerCLI commands for administration without the GUI. In addition to this I have linked an example of a time savings report to show what virtual machines have a snapshot and who old they are.
Installing PowerCLI
First you will need to install the PowerCLI module with the following command.
Install-Module -Name VMware.PowerCLI
When I first tried to install this module, I received an error message. As you can see in the screen shot, the recommendation is to use the “-AllowClobber” switch.
The command that I found worked to get this module installed is as follows:
Install-Module -Name VMware.PowerCLI -Confirm:$false -AllowClobber -Force
After the module is successfully installed, I import the module with this command:
Import-Module -Name VMware.PowerCLI
Connecting to vCenter
Now that the module is installed, we can connect to our vCenter server.
The command to we will use is:
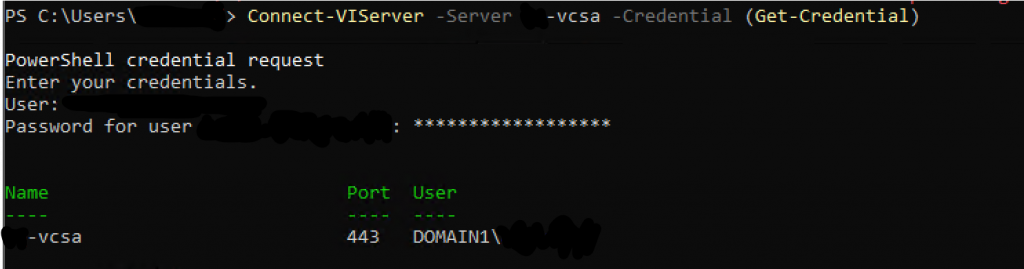
Connect-VIServer -Server {ip or fqdn} -Credential (Get-Credential)Make sure to replace “{ip or fqdn}” with the correct information for your vCenter server.
When I ran this for the first time, I received an error message of “The SSL connection could not be established, see inner exception.” This error is due usually due to your vCenter using the self-signed SSL certificate. In order to overcome this error, you will need to tell PowerCLI to ignore invalid certificates.

You can run the Get-PowerCLIConfiguration command to see your current settings. You should see something like this:

In order to set “InvalidCertificateAction” to ignore, you will need to issue the following command.
Set-PowerCLIConfiguratin -InvalidCertificateAction Ignore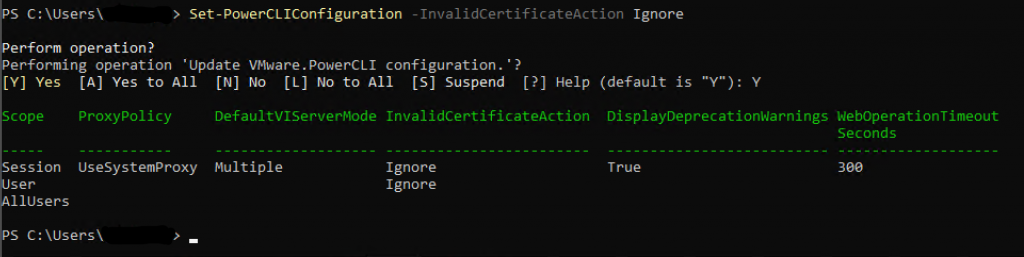
Now if you issue the “Connect-VIServer” command again, you should see that you are successfully connected.
One last thing to keep in mind, you should all ways disconnect from the vCenter server before closing out your PowerShell session. To do this you simpally issue this command.
Disconnect-VIServer -Server {ip or fqdn}
Final thoughts
This is the very first step in some pretty useful and time saving scripting of your VMware environment. VMware offers a user guide for PowerCLI. It can be found here Online Documentation – PowerCLI 12.0.0 User’s Guide – VMware {code}. I will also be posting a short guide on how I will be using a scheduled PowerShell script to email a report of all snapshots in my environment once a week.